Night Photography 101: Capturing the Stars and City Lights

The night sky, with its myriad stars and celestial wonders, has long captivated photographers seeking to capture its beauty. Pair it with the vibrant atmosphere of city lights, and you have a captivating scene that is both challenging and rewarding to photograph. Night photography, especially when it involves capturing the stars and city lights, requires a unique set of skills and techniques. It demands patience, an understanding of camera settings, and an eye for composition. This article will serve as your guide to capturing stunning night photographs, ensuring that you return home with breathtaking images that showcase the beauty of the night.

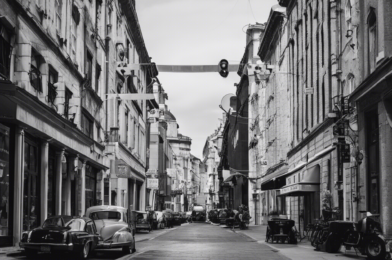
First and foremost, location scouting is crucial for night photography. Look for places that offer a clear view of the sky, away from light pollution, to capture the stars in all their glory. Cityscapes with bright lights and interesting architectures can provide captivating foreground elements for your starry backdrop. Plan your shoot around the moon phases; a full moon can wash out the stars, so consider photographing during a new moon or when the moon is in a crescent phase. Additionally, check for light trails created by cars or moving lights, as these can add dynamic elements to your city light photographs.

Mastering your camera settings is essential for successful night photography. Since you’ll be working in low-light conditions, longer exposures are typically required to capture sufficient light. Experiment with aperture settings; wider apertures let in more light but also result in a shallower depth of field, while smaller apertures provide a deeper focus but require longer exposure times. ISO settings control your camera’s sensitivity to light; higher ISO values can introduce noise, so balance it according to the lighting conditions and your camera’s capabilities.

Understanding White Balance for Better Color in Your Photos

Have you ever taken a photo and been disappointed by how the colors turned out? The culprit might be your camera’s white balance setting. Understanding white balance is key to achieving accurate and appealing colors in your photographs. White balance is your camera’s way of interpreting and adjusting to the color temperature of a light source, ensuring that whites appear truly white and that the full range of colors is rendered accurately.

Imagine you’re photographing a sunny day at the beach. Your camera needs to understand that the sunlight is casting a warm, yellow hue on the scene, and compensate for this to give you true-to-life colors. This is where white balance comes in. By setting the correct white balance, you can ensure that your photos capture the vibrant blues of the ocean and the bright, sunny atmosphere accurately.

Your camera likely has several preset white balance options, including “Auto,” which uses the camera’s own judgment to set the white balance. There are also preset options for specific lighting situations, such as “Sunlight,” “Cloudy,” “Shade,” and “Fluorescent.” These presets can be a quick and easy way to ensure more accurate colors in your photos, but they may not always produce the most appealing results. That’s why it’s important to understand custom white balance settings too.

Custom white balance allows you to fine-tune the color temperature to match the specific lighting conditions of your scene. This is particularly useful when you’re dealing with mixed lighting, such as artificial lights indoors, or when you want to create a specific mood or atmosphere with your color palette. By learning how to manually adjust your white balance, you can take greater creative control over your photography.

Achieving accurate white balance starts with understanding color temperature, which is measured in Kelvin (K). Higher Kelvin numbers indicate cooler, more bluish tones, while lower numbers indicate warmer, more yellowish or reddish tones. For example, a candle flame has a color temperature of around 1,500K, while a clear blue sky sits at around 20,000K.

Your camera likely displays color temperature on a scale that goes beyond the Kelvin range, typically from 2,000-10,000 or more. This extended range gives you finer control over the exact tone you want to achieve. For instance, you might push toward a cooler tone for a winter scene, or a warmer tone for a sunset, even if the lighting conditions don’t naturally call for it.

In addition to understanding color temperature, it’s important to know how your camera interprets light. Your camera’s auto white balance feature uses a complex algorithm to analyze the scene and make adjustments. However, auto mode doesn’t always get it right, especially in mixed or low-light conditions. This is where custom white balance settings come in handy, allowing you to guide the camera toward a more accurate interpretation of the light.

Finally, post-processing software can be a powerful tool for fine-tuning the white balance and color of your photos. Most software provides simple sliders for adjusting temperature and tint, making it easy to experiment with different looks. However, it’s always better to get it right in-camera first, as this gives you a stronger foundation to work from and can save you time in the editing process.

Phone Photography Hacks: Pro-Level Shots with Your Smartphone

We live in an age where everyone has a high-quality camera right in their pocket. With just a few simple tricks, you can turn your smartphone into a powerful tool for capturing stunning photographs that will surely catch everyone’s eye.

First, let’s talk about lighting. Natural light is your best friend when it comes to phone photography. Whenever possible, try to take photos during the golden hour, which is the hour after sunrise or before sunset. This soft, warm light adds a beautiful glow to your images. If you’re shooting during the day, position yourself with the sun behind you to illuminate your subject. But be careful not to shoot directly into the sun, as it can wash out your photos.

Another lighting trick is to use reflectors. You can use everyday items like a white foam board or a piece of aluminum foil to reflect light onto your subject and fill in harsh shadows. Simply position the reflector opposite to the light source for more even lighting.

Composition-wise, a great rule to follow is the rule of thirds. Imagine your viewfinder is divided into nine equal parts by two horizontal and two vertical lines. Try to place your subject along these lines or at the points where they intersect. This creates a sense of balance and makes your photos more interesting to look at. You can usually enable a grid in your camera settings to help you with this.

Don’t be afraid to get creative with your angles. Experiment with different perspectives by shooting from above, below, or at eye level. Try kneeling down or climbing to a higher vantage point to capture a unique point of view. Playing with angles adds variety to your photos and can make ordinary subjects look extraordinary.

When it comes to focusing, most smartphones nowadays have tap-to-focus capabilities. Use this feature to your advantage by tapping on your subject to ensure it’s in focus. This is especially useful when dealing with shallow depth of field effects or when trying to achieve a sharp focus on a specific element in your frame.

The beauty of digital photography is that you can take as many photos as you want without the cost of film and developing. So, take advantage of this by snapping multiple shots of the same scene. Change your position, adjust your settings, or capture different expressions or moments. Out of 10 photos, you’ll likely find one or two that you truly love.

Getting Started with Manual Mode: A Beginner’s Guide

Making the leap from automatic to manual mode in photography can be a daunting task for beginners, but it’s an essential step to gaining full creative control over your images. Manual mode allows you to make precise adjustments to your camera settings, giving you the power to capture stunning photos in any lighting condition. While it may seem intimidating at first, with practice and patience, you’ll be rewarded with a deeper understanding of photography and images that truly reflect your artistic vision.

So, where do you start? First, familiarize yourself with the fundamentals of manual mode. This includes understanding the exposure triangle: aperture, shutter speed, and ISO. Aperture refers to the opening in your lens that lets in light, and it affects the depth of field, or how much of your image is in focus. Shutter speed pertains to how long your camera’s shutter stays open, impacting whether movement is captured as a blur or a crisp, frozen moment. Meanwhile, ISO regulates your camera’s sensitivity to light, with higher settings allowing better low-light photography but at the cost of potential noise or grain in your image.

The key to mastering manual mode is understanding how these three settings work together to achieve proper exposure. Every scene you photograph will have an ideal combination of aperture, shutter speed, and ISO settings, and part of the art of manual photography is learning to recognize these ideal conditions and quickly dial in the correct settings.

Start by setting your camera to manual mode and taking a few test shots of a static subject in different lighting conditions. Adjust one setting at a time, observing how it affects the overall exposure and visual effect of your image. Remember, the beauty of manual mode is that you have the freedom to prioritize different elements within a scene. For example, you might choose a fast shutter speed to freeze motion or a wide aperture to create a shallow depth of field and beautifully blur the background.

As you gain confidence, challenge yourself to shoot in more complex environments, such as low-light conditions or action-packed scenes. Don’t be afraid to experiment and embrace trial and error as part of the learning process. With each click of the shutter, you’ll develop a deeper intuition for the right settings to use, and before long, manual mode will become second nature.

To expedite your learning, consider seeking out online tutorials or enrolling in a beginner-friendly photography course. Joining a photography community or local club can also provide you with valuable feedback and inspiration as you hone your craft. Remember, the journey to mastering manual mode is as much about developing your artistic eye as it is about understanding the technical aspects of your camera. Always keep an eye out for interesting subjects, unique lighting conditions, or captivating compositions that can translate into captivating photographs.

Lastly, remember to enjoy the process! Photography is a creative art form, and manual mode gives you the tools to truly make it your own. Embrace the freedom and flexibility it offers, and don’t be afraid to break the rules now and then. With patience, practice, and a keen eye for capturing the beauty around you, you’ll be well on your way to becoming a master of manual mode photography.

Landscape Photography: Capturing Nature’s Beauty

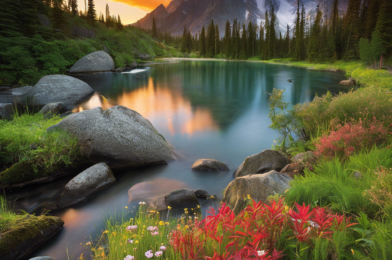
Landscape photography has become an increasingly popular art form, with many photographers venturing into nature to capture the breathtaking beauty of our planet. It is a captivating genre that invites viewers to embark on a visual journey, exploring the vast and diverse landscapes our world has to offer. From majestic mountain ranges to serene lakes and ancient forests, landscape photographers aim to freeze these awe-inspiring scenes, inviting viewers to appreciate nature’s grandeur.

This unique form of photography not only showcases the beauty of our natural world but also captures the essence and mood of a location. A skilled landscape photographer can convey a sense of tranquility or adventure, inviting viewers to imagine themselves immersed in the scene. It is about more than just taking a picture; it’s about evoking an emotional response and a sense of wonder. The genre has evolved to become a powerful medium, inspiring a deeper appreciation for the environment and a desire to protect our planet’s fragile beauty.

One of the intriguing aspects of landscape photography is the ability to capture the interplay between light and nature. The magical hour just after sunrise or before sunset, known as the golden hour, provides a warm, soft light that transforms landscapes. During this time, photographers can capture stunning silhouettes, vibrant skies, and dramatic shadows that add depth and emotion to their images. The challenge of working with natural light and the ever-changing conditions keep photographers on their toes, requiring them to be patient, adaptable, and in tune with their surroundings.

Capturing the beauty of nature also lies in the intricate details, from the delicate veins of a leaf to the ripples in a stream. Landscape photographers often employ various techniques to showcase these finer points, drawing viewers into the frame and encouraging them to notice the smaller wonders that might otherwise be overlooked. A close-up of a dew-covered spider web, for instance, can reveal the intricate beauty and complexity of nature, reminding us that beauty lies in the details.

Composition plays a pivotal role in landscape photography, as it guides the viewer’s eye through the image, creating a sense of balance and harmony. Leading lines, rule of thirds, and symmetry are just a few of the techniques photographers use to craft compelling compositions. Masterful use of these elements can add depth and perspective to an image, inviting viewers to embark on a visual journey through the landscape. Leading lines, such as a winding path or a river, can guide the viewer’s gaze, adding a sense of movement and direction.

Landscape photographers also rely on an array of equipment to capture the finest details and most captivating views. From wide-angle lenses that encompass vast landscapes to telephoto lenses that isolate specific scenes, the right tools enable photographers to showcase the grandeur of nature in all its glory. Tripods and filters are also essential for creating crisp, clear images, especially in low-light conditions.

Post-processing is another crucial step in the landscape photography workflow. Using editing software, photographers can enhance their images, bringing out the true colors and tones of the scene. It allows them to adjust lighting, sharpen details, and make selective adjustments to create images that faithfully represent their vision and the beauty they witnessed firsthand.

Landscape photography is more than just taking pictures of pretty places. It’s about connecting with nature, capturing its essence, and sharing it with the world. It inspires us to explore, appreciate, and protect our planet, reminding us of the awe-inspiring beauty that surrounds us. Whether it’s a majestic mountain range or a tranquil lakeside, landscape photographers capture nature’s beauty, inviting us to embark on a visual journey of discovery and appreciation.

Mastering Portrait Photography: Lighting Tips for Beginners

Portrait photography is an art that captures the essence of a person, freezing a moment in time and telling a story. Lighting is a crucial element in this genre, as it shapes the subject’s features, sets the mood, and determines the overall aesthetic of the image. For beginners, understanding and mastering lighting techniques can be a challenge, but with a few simple tips, anyone can start taking stunning portrait photos.

One of the first things to consider is the quality of light. Soft, diffused light is ideal for portraits as it wraps around the subject’s face, softening features and creating a flattering look. Hard light, on the other hand, can cast strong shadows and create high-contrast images, which may not be as beginner-friendly. A simple way to create soft light is by using a diffuser, such as a translucent white umbrella or a softbox, which will soften the light from your flash or strobe.

The direction of light is another important factor. Experiment with different lighting angles to see how it affects the mood and overall look of your portraits. Front lighting, where the light source is in front of the subject, is the most basic form and can be flattering, especially for beginners. Side lighting creates more dramatic images by emphasizing textures and bringing out the subject’s features. Backlighting, where the light source is behind the subject, can create a beautiful halo effect and add a sense of depth to your portraits.

Don’t be afraid to experiment with natural light sources as well. Window light is a great option for beginners as it provides soft, diffused light that flatters the subject. Simply position your subject near a window and experiment with different angles and distances to see how the light falls on their face. You can also try shooting during the golden hour, the hour before sunset, or after sunrise, when the light is warm and soft, creating a beautiful, romantic ambiance in your photos.

Reflectors are another useful tool for beginners. They help fill in shadows and brighten up the subject’s face, especially when using natural light. Gold, silver, and white reflectors are commonly used, each offering a different effect on the overall tone and mood of the image.

When shooting outdoors, pay attention to the sun and how it moves throughout the day. Overhead sunlight can create harsh shadows on faces, so it’s often best to seek open shade, such as beneath a tree or in the shadow of a building, for more flattering results. You can also use reflectors outdoors to fill in any harsh shadows cast by the sun.

Mastering portrait photography lighting also involves understanding the settings on your camera. Aperture, shutter speed, and ISO all play a crucial role in how your images turn out. A wide aperture (a low f-stop number) will let in more light and create a shallow depth of field, blurring the background and bringing focus to your subject. A slower shutter speed will also let in more light but be careful not to go too slow or you’ll end up with blurry images due to camera shake. Increasing your ISO can help with low-light situations but be mindful of the trade-off between brightness and image noise.

Lastly, practice, practice, practice! Portrait photography is a skill that takes time and dedication to master. Experiment with different lighting setups, observe how professional photographers light their subjects, and analyze what makes certain portraits captivating. With patience and persistence, you’ll be well on your way to creating stunning portrait photographs.

Composition Basics: Rule of Thirds and Beyond

The rule of thirds is a fundamental principle in composition, a handy tool to elevate your photography and design skills to the next level. It’s a simple concept that divides your image into a grid of nine equal parts, like a tic-tac-toe board, and it helps you place your subject matter for a more balanced and engaging image.

Placing the important elements of your photo along these lines or at their intersections will create a sense of balance and harmony. This technique is used to draw the viewer’s attention to a specific area of the image and create a more dynamic and interesting composition. Consider a breathtaking landscape: placing the horizon along the top or bottom line, with key features like trees or buildings at the intersection points, instantly adds depth and interest.

Beyond its basic application, the rule of thirds also encourages creativity. Try tilting your camera or adjusting your viewpoint to play with the grid layout. Using negative space effectively can give your images a more artistic and contemporary feel. Think of a close-up portrait with the subject’s eyes positioned at one of the intersection points, adding a sense of intrigue and connection.

The rule of thirds is a versatile guideline, applicable to various subjects and genres. For instance, in sports photography, capturing the athlete in motion, with the ball positioned at one of the intersection points, conveys a sense of action and movement. It’s all about creating a visual path for the viewer’s eyes to follow, leading them on a journey through your image.

While the rule of thirds is a trusty companion, it’s also worth noting that rules are sometimes meant to be broken. Experimenting with unusual compositions can lead to unique and captivating results. Centering your subject or placing them off to one side can be powerful techniques in certain contexts. As with all rules, understanding when and how to break them is key to developing your artistic style.

To further enhance your compositions, consider leading lines, symmetry, and patterns. Leading lines are elements within a scene that guide the viewer’s eye towards the main subject. They can be anything from a path, a river, or even a shadow, adding depth and perspective to your image. Symmetry and patterns, on the other hand, create a sense of balance and harmony, especially in architecture or natural formations like reflections in water.

Composition is a powerful tool to convey mood and emotion. Playing with depth of field and focusing on specific elements can evoke feelings of calm or tension. Negative space and minimalism emphasize solitude, while busy scenes with multiple subjects can convey energy and excitement. Understanding these techniques allows you to tell a story with your images, engaging your viewers and inviting them to see the world through your lens.

Remember, the rule of thirds is just the beginning. As you develop your artistic eye, you’ll discover a world of advanced composition techniques, from the Golden Ratio to the Rule of Odds. Embrace experimentation, and don’t be afraid to break the rules. The beauty of composition is that it’s a creative journey unique to every artist. So, grab your camera, start snapping, and let your imagination guide you to breathtaking visuals that captivate and inspire.

10 Tips for Taking Sharper Photos

Taking sharp, crisp photos can be a challenge, but it’s a rewarding skill to master. Here are ten tips to help you improve the sharpness of your images and take your photography to the next level:

1. Stabilize Your Camera: Camera shake is one of the main causes of blurry photos. To avoid this, stabilize your camera by using a tripod or placing it on a solid surface. If you’re shooting handheld, hold your camera close to your body and brace your elbows against your sides for additional support.

2. Use a Fast Shutter Speed: Choosing a faster shutter speed can help freeze motion and prevent blur caused by camera shake or moving subjects. As a general rule, your shutter speed should be faster than your focal length. For example, if you’re shooting with a 200mm lens, your shutter speed should be 1/200th of a second or faster.

3. Adjust Your Aperture: The aperture of your lens affects the depth of field, or the zone of sharp focus, in your images. For maximum sharpness, it’s often best to use a narrow aperture (higher f-stop number) as this will give you a larger depth of field. However, be mindful that too narrow an aperture can lead to diffraction, which can also reduce sharpness.

4. Focus Carefully: Pay attention to your camera’s focus points and ensure they’re positioned on your desired subject. Use manual focus if your camera struggles to focus automatically in certain situations.

5. Use a Remote Shutter Release: To eliminate any potential camera shake caused by pressing the shutter button, use a remote shutter release or the self-timer function on your camera. This is especially useful when shooting long exposures or macro photography.

6. Choose the Right Lens: Different lenses have varying sharpness characteristics. Prime lenses (with fixed focal lengths) tend to be sharper than zoom lenses. Also, look for lenses with image stabilization technology, which can help counteract camera shake.

7. Understand Your Camera’s Sensor Size: The size of your camera’s sensor affects the depth of field. Smaller sensors provide a deeper depth of field at any given aperture setting compared to larger sensors.

8. Shoot in Raw Format: Raw files retain more data and offer greater flexibility when editing compared to JPEGs. This allows you to make adjustments to sharpness and other details during post-processing.

9. Focus on Proper Lighting: Insufficient light can lead to blurry photos as your camera may compensate with a slower shutter speed. Ensure you have adequate lighting or use a flash to freeze motion and capture sharper images.

10. Practice Good Technique: Lastly, pay attention to your technique. Hold your camera straight and level to avoid converging verticals, and be mindful of your body position to maintain stability.

By following these tips and practicing your technique, you’ll be well on your way to capturing sharper, more captivating photos that truly stand out. Happy shooting!

Understanding the Exposure Triangle: ISO, Aperture, and Shutter Speed

Photography is an art, a science, and a passion for many, offering a unique way to capture and interpret the world around us. For photographers, the exposure triangle is a fundamental concept, a triumvirate of settings that can make or break an image. The three elements, ISO, aperture, and shutter speed, work in harmony to let the right amount of light hit the camera sensor, creating a perfectly exposed photograph. This delicate balance is an essential skill for photographers to master, offering creative control and the ability to adapt to any lighting condition.

Let’s start with ISO, which is essentially the camera sensor’s sensitivity to light. A lower ISO setting means the sensor is less sensitive to light and is ideal for bright conditions, producing sharp and crisp images. In darker environments, increasing the ISO makes the sensor more sensitive, allowing for faster shutter speeds and preventing blurry photos. However, there’s a trade-off; higher ISO settings can introduce unwanted digital noise, resulting in grainy images.

The aperture is all about controlling the depth of field, or how much of your image is in focus. A larger aperture, indicated by a smaller f-number (e.g., f/1.8), means more light is entering the lens, resulting in a shallower depth of field. This is great for portraits, creating a beautiful bokeh effect where the subject is sharp and the background is softly blurred. Conversely, a smaller aperture, denoted by a larger f-number (e.g., f/16), lets in less light and gives you a deeper depth of field, ensuring that more of your scene is in focus.

Shutter speed dictates how long the camera shutter remains open, controlling how long light is exposed to the sensor. Faster shutter speeds freeze motion, capturing fast-moving subjects with crisp clarity. Slower shutter speeds, on the other hand, introduce motion blur, effectively conveying a sense of movement in your photos. This setting becomes crucial when photographing sports or wildlife, ensuring you capture the action without blur, or when aiming for artistic blur effects like those seen in long-exposure photography of waterfalls or light trails.

The dance between these three elements is a delicate one, and mastering their interplay gives photographers creative freedom. A brighter environment may call for a lower ISO and faster shutter speed, while a dimly lit scene might require a longer exposure and higher ISO. Each scenario is unique, and understanding how to adjust these settings to achieve the desired result is key to becoming a proficient photographer. Like a conductor orchestrating a symphony, the photographer manipulates the exposure triangle to create visual harmony from the chaos of light and shadow.

Consider a sunny day at the beach. You’d likely opt for a lower ISO to reduce noise, a smaller aperture to ensure a deeper depth of field, and a faster shutter speed to avoid overexposure. Conversely, shooting the night sky calls for a higher ISO to capture faint light, a larger aperture to collect more light, and a slower shutter speed to brighten the exposure. It’s a balancing act, and the challenge lies in tweaking these settings to achieve the desired effect while maintaining optimal exposure.

The exposure triangle is a cornerstone of photography, empowering photographers with the knowledge to adapt to various lighting scenarios and artistic intentions. By understanding ISO, aperture, and shutter speed, photographers can unlock the full potential of their camera, turning mundane scenes into captivating compositions. So, the next time you’re out capturing the world through your lens, remember the delicate dance of the exposure triangle, and you’ll be sure to create images that truly shine.

Whether you’re a seasoned photographer or a novice with a passion for visuals, the exposure triangle is a concept that demands attention and practice. Through experimentation and a keen eye, you’ll soon master the art of balancing ISO, aperture, and shutter speed, taking your photography skills to new heights. So, embrace the triangle, and let your creative vision come to life in stunning detail and clarity.